Thomas Mitchell gives a great extra step in his Udemy course walking the student through created a new virtual network for the Windows virtual desktops. I’m going to attempt to recreate the same thing in my Azure environment. I can see a few good reasons for doing so including the logical purpose of network segmentation. Keeping those virtual desktop assets segmented on a completely different virtual network from our Azure Active Directory components including the DC’s and the management server. This is of course going to change our network map a bit as we’ll see in a second.
If you haven’t done this before, it works pretty much like everything else. Click on the hamburger navigation icon, + Create a Resource.

The resource type you are looking for is Virtual Network and you’ll simply press create when you find the virtual network resource.

Once again when creating the virtual network, as we did earlier, we’ll deploy it to the lab resource group that we created. I’m going to name it vnet-virtualdesktops. Your region is again important to set for your locale. Click next to configure the IP addresses for the vNet.

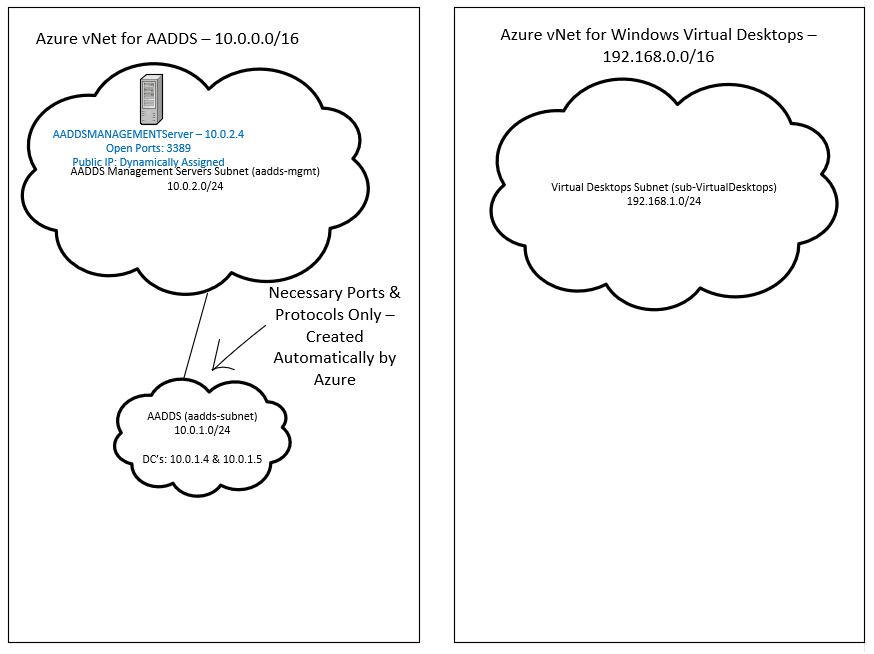
In the IP address section, I’ve chosen to pick a different subnet than the first vNet of 192.168.0.0/16. Way larger than necessary but makes the network diagram easier to digest. I’m also going to create a new subnet for the Virtual Desktops of sub-VirtualDesktops with a subnet address range of 192.168.1.0/24.

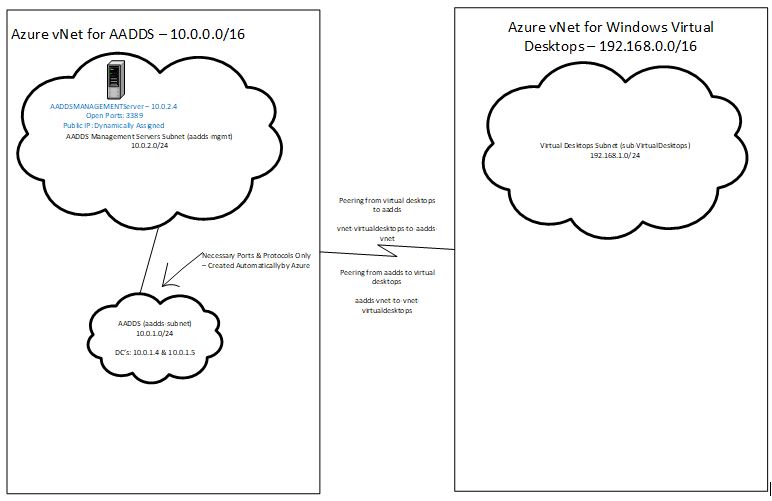
At this point, as messy as the naming and IP addressing is, this is what our network vNet’s look like along with their subnets. At this point, there is no connection between the two vNets so the desktops can’t talk to the appropriate resources in the AADDS vNet.
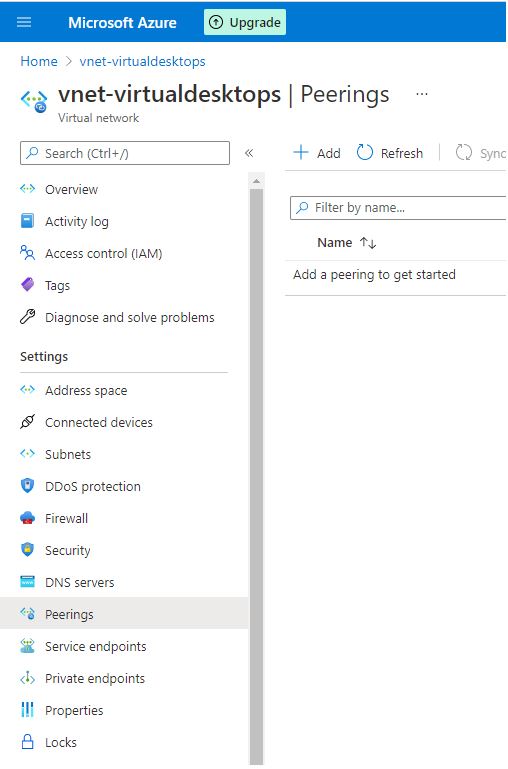
For the two to talk to one another, the virtual networks (v-nets) need to peer. This includes pointing DNS services from the virtual desktop network to the auto-provisioned domain controllers in the AADDS vNet. To perform the peering, you must enter the vNet management screen for your virtual desktops vNet. You would then head to Peerings on the left side as pictured below.
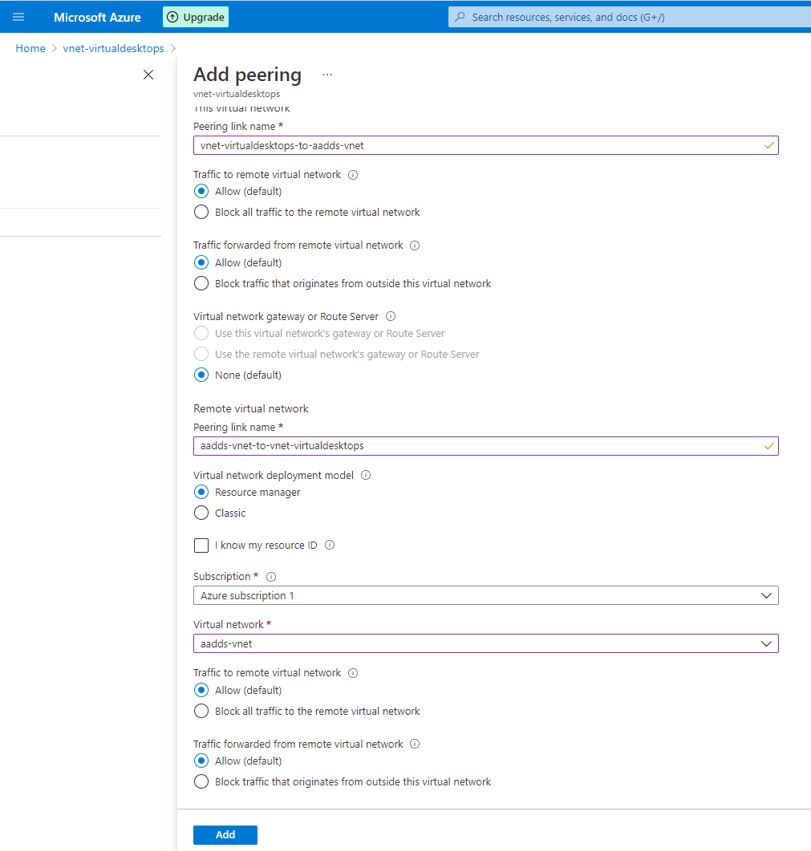
As you can probably guess, you simply click + Add to add a new peering. I’m going to skip a screenshot here as it’s shown in the prior screenshot. Links must be created bi-directionally, so we’ll take care of both in one shot here. First things first, you need to create peering link names for each direction. I’ve chosen vnet-virtualdesktops-to-aadds-vnet and aadds-vnet-to-vnet-virtualdesktops. Given more time and planning I’d probably have chosen something more creative. We will allow all traffic to and from the virtual network. You’ll select your subscription for the lab (should be the default unless you have multiple subscriptions) and choose the far-end virtual network. Earlier I said we would be working in the vNet for virtual desktops, so the far side here would be the aadds-vnet! Then we simply click add.
If you are successful in creating the peering, you will see that the peering status is connected. For some reason, in doing this lab independently after training, it took creating it, deleting it, and creating it again for it to connect.

At this point our network map looks a little something like this:
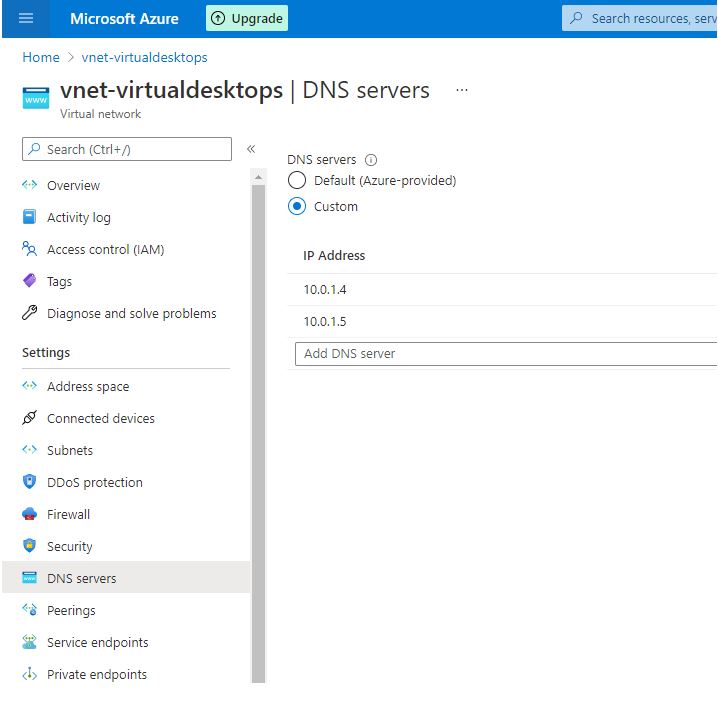
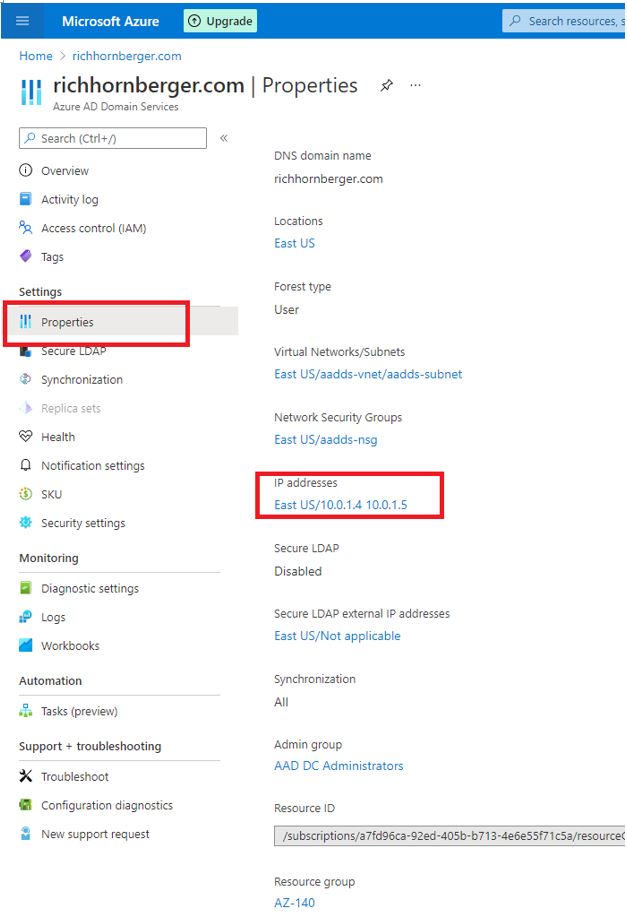
Now as mentioned a bit earlier, our Windows Virtual Desktops are going to need DNS from somewhere to connect to the domain, get out to the web, take your pick. To save time and save creating another “internal” DNS server, we’re just going to use the auto-created DC’s in the domain. In order to find their IP’s we can return to the home screen, and click into our domain, in this case, richhornberger.com.

From there, we can click on properties, and we’ll see the two auto-created DC’s which include 10.0.1.4 and 10.0.1.5. These have also been noted on our network map.
So if we go back into our vNet for the virtual desktops (vnet-virtualdesktops) from the home screen, and click on DNS Servers, we can add them in as custom DNS servers for the vNet and the remainder of the exercises.